17
ARRANGING AND STORING FOOD IN
YOUR REFRIGERATOR
Position different food in different compartments according to be
below table
Door or balconies of fridge
compartment
• Foods with natural preservatives,
such as jams, juices, drinks,
condiments.
• Do not store perishable foods
Crisper drawers (salad
drawer)
• Fruits, herbs and vegetables should
be placed separately in the crisper
bin
• Do not store bananas, onions,
potatoes, garlic in the refrigerator
Fridge shelf – top
• Foods that do no need coocking,
such as ready-to-eat foods, deli
o
It’s suggested to set the temperature at 4°C in the fridge compartment,
and, whether possible, at -18°C in the freezer compartment.
o
For most food categories, the longest storage time in the fridge
compartment is achieved with colder temperatures. Since some
particular products (as fresh fruits and vegetables) may be damaged
with colder temperatures, it is suggested to keep them in the crisper
drawers, whenever present. If not present, maintain an average setting
of the thermostat.
o
For frozen food, refer to the storage time written on the food packaging.
This storage time is achieved whenever the setting respects the
reference temperatures of the compartment (one-star -6°C, two stars -
12°C, three stars -18°C)
o
Warm food or evaporating liquids should not be stored in your
refrigerator, as this will increase the humidity inside of the appliance.
o
All foods should be wrapped or covered, this is particularly important if
the food has a strong flavour. You should use polythene bags or sheets,
aluminium foil, wax paper. Liquids should be stored in covered
containers or bottles.
o
To maximise the space inside of your refrigerator, any excessive
packaging on the food should be removed.
o
Quickly perishable food should be stored at the back of the
refrigerator, which is the coldest part of the appliance.
o
No food items should be allowed to come into contact with the back wall
of the refrigerator.
o
Make sure that you arrange food in such a way that the door can close
completely. Particular attention should be given to bottles that may
protrude when placed on shelves inside the main section of the
refrigerator.
o
Some organic solutions, such as the oils in lemon/orange peel and acid
in butter, can cause damage to the plastic parts contained inside of the
refrigerator.
o
Do not open the refrigerator door too often or leave the door open for
long periods of time, as this will increase the temperature inside of the
appliance and will increase the energy usage.
o
Meat should be wrapped in polythene bags and then placed on the
glass shelf above the salad drawer.
(Meat should only be stored in this manner for one or two days at the
most).
o
Cold dishes/cooked food should be covered and can be placed on any
shelf.
o
Fruit and vegetables should be cleaned thoroughly and placed in
the salad drawer.
o
Cheese and butter should be placed in airtight containers, or they
can be wrapped in aluminium foil or polythene bags. As much air as
possible should be removed from the bags.
o
Milk bottles should have a cap on them and be stored on the
bottle shelf that sits in the door.
o
Garlic, potatoes, onions and bananas should only be
stored in a refrigerator IF they are stored in airtight
containers.
SAVING ENERGY WHEN USING YOUR
REFRIGERATOR
Installing:
o
Install the appliance in a cool position. If it is placed in direct sunlight
or next to an oven or other heat source, the energy consumption can
increase substantially.
o
Ensure the appliance is installed with the correct ventilation
requirements. Restricting ventilation can increase the energy
consumption by 15%.
Cleaning and Maintenance:
o
Occasionally clean the condenser coils (if present) at the
back of the appliance to maintain a high performance level.
o
Clean the door gasket with warm water or a neutral detergent that
leaves no residue. A tight-sealing door gasket is critical to the efficiency
of your appliance.
Usage:
o
Do not open the door repeatedly or more frequently than you have to.
o
Do not set the thermostat too low. A change of just one degree
can effect the energy consumption by 5%. Use a thermometer to check
the temperature.
o
The refrigerator should operate at around 3 to 4 degrees Celsius.
o
Allow food to sufficiently cool before putting it in the appliance (but don’t
let it sit at room temperature for too long).
o
If you are going away for a long period of time, turn off the
appliance, empty and clean it and leave the door ajar.
o
If you have a second appliance that is not used, make sure that it is
stored with the power off and the door left ajar until it is actually
required.
Disposing:
o
If you're going to throw out your old fridge, see if there's a
chlorofluorocarbons (CFCs) recycler in your area. The government
department which looks after the environment in your area may be able
to help you.
CLEANING AND MAINTENANCE
WARNING: PLEASE ENSURE THAT YOUR APPLIANCE IS DISCONNECTED
FROM YOUR MAINS SUPPLY BEFORE ATTEMPTING TO CLEAN IT.
o
Do not clean the appliance by pouring water onto it or spraying
water over it.
o
The refrigerator compartment should be cleaned periodically,
using a solution of bicarbonate of soda and lukewarm water.
o
Clean the accessories separately with soap and water. Do not clean
them in a dishwasher.
o
Do not use abrasive products, detergents or soaps.
o
After washing the appliance, wipe over the area that you have
cleaned with a damp cloth and then dry it thoroughly.
o
When cleaning is complete, dry your hands and then reconnect the
plug to your mains supply.
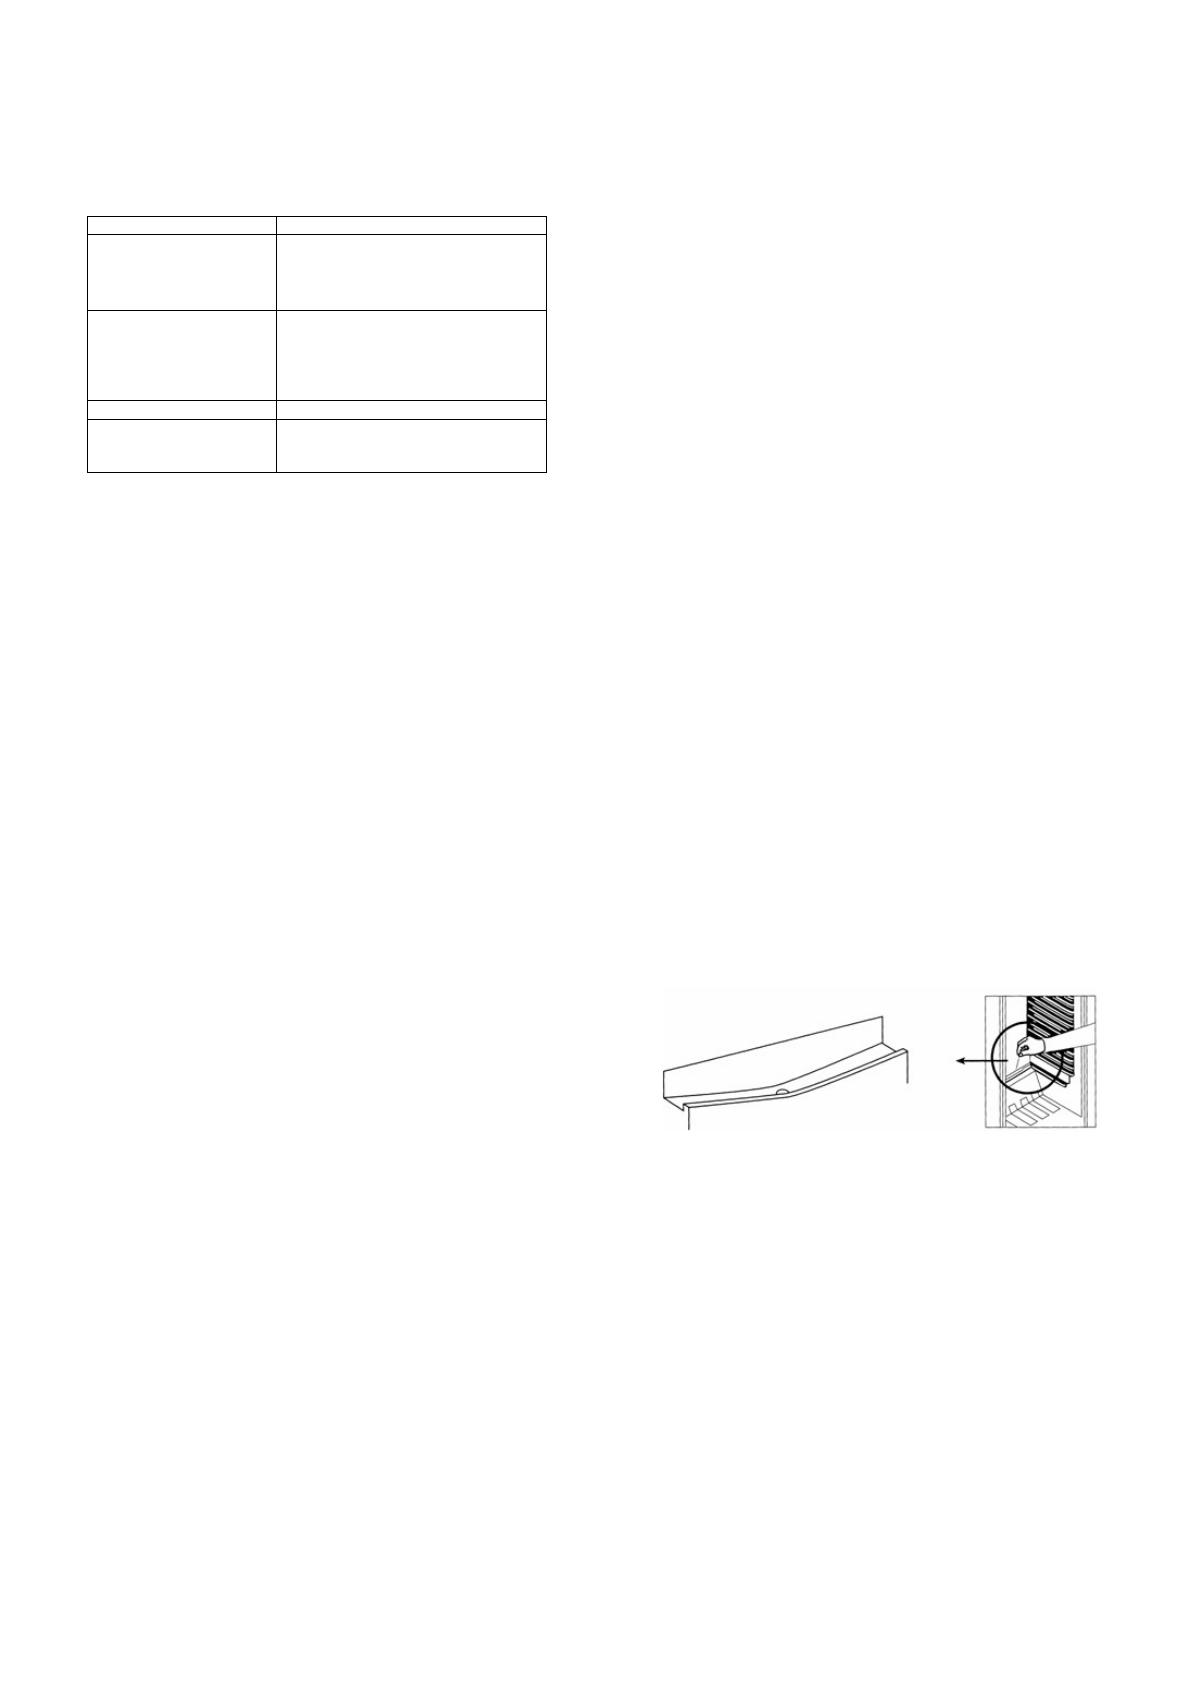
The defrost drain hole
Defrosting occurs automatically in the refrigerator compartment
during operation. The defrost water is collected by the evaporating
tray and evaporates automatically.
o
The drain hole should be cleaned periodically with the drain hole
cleaner. This will prevent water from collecting in the bottom of the
refrigerator, instead of flowing down the defrost drainage channel
and drain hole.
IMPORTANT: Please note that the drain hole cleaner should not be left in
position permanently. Otherwise this may prevent the defrost water from
entering the drain hole.
o
You can also pour a small amount of water down the drain hole to
clean the defrost drainage channel.
o
You should be careful to make sure that food packages do not
touch the rear wall of the appliance, as this can interrupt the
automatic defrosting process and deflect water into the base of your
refrigerator.
o
Use a solution of bicarbonate of soda and lukewarm water to
clean the evaporating tray.
IMPORTANT: It is normal to get some ice droplets forming on the back
wall of the appliance. The formation of ice droplets does not indicate
an appliance fault.


