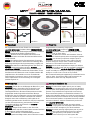
Nachfolgend finden Sie eine kurze Information für MFIT TRANSIT 6 CONNECT, MFIT TRANSIT 6 CUSTOM. Dieses hochwertige AUDIO SYSTEM Produkt mit GERMAN SOUND bietet eine optimale Klangqualität. Beachten Sie die Anweisungen des Automobilherstellers und prüfen Sie die Polarität beim Anschließen der Lautsprecher. Ihr Kaufbeleg dient als Garantienachweis. Die Installation sollte von einem Fachmann durchgeführt werden. Schließen Sie zuerst den Minuspol der Fahrzeugbatterie ab. Die beste Einbauposition sind die Originalplätze. Achten Sie auf eine plane und stabile Montage und schützen Sie die Lautsprecher vor äußeren Einflüssen. Die korrekte Polarität ist entscheidend. Die Frequenzweiche kann zur Anpassung an Fahrzeugakustik und Musikrichtung verwendet werden.
Nachfolgend finden Sie eine kurze Information für MFIT TRANSIT 6 CONNECT, MFIT TRANSIT 6 CUSTOM. Dieses hochwertige AUDIO SYSTEM Produkt mit GERMAN SOUND bietet eine optimale Klangqualität. Beachten Sie die Anweisungen des Automobilherstellers und prüfen Sie die Polarität beim Anschließen der Lautsprecher. Ihr Kaufbeleg dient als Garantienachweis. Die Installation sollte von einem Fachmann durchgeführt werden. Schließen Sie zuerst den Minuspol der Fahrzeugbatterie ab. Die beste Einbauposition sind die Originalplätze. Achten Sie auf eine plane und stabile Montage und schützen Sie die Lautsprecher vor äußeren Einflüssen. Die korrekte Polarität ist entscheidend. Die Frequenzweiche kann zur Anpassung an Fahrzeugakustik und Musikrichtung verwendet werden.


-
 1
1
-
 2
2


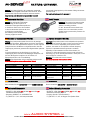
Nachfolgend finden Sie eine kurze Information für MFIT TRANSIT 6 CONNECT, MFIT TRANSIT 6 CUSTOM. Dieses hochwertige AUDIO SYSTEM Produkt mit GERMAN SOUND bietet eine optimale Klangqualität. Beachten Sie die Anweisungen des Automobilherstellers und prüfen Sie die Polarität beim Anschließen der Lautsprecher. Ihr Kaufbeleg dient als Garantienachweis. Die Installation sollte von einem Fachmann durchgeführt werden. Schließen Sie zuerst den Minuspol der Fahrzeugbatterie ab. Die beste Einbauposition sind die Originalplätze. Achten Sie auf eine plane und stabile Montage und schützen Sie die Lautsprecher vor äußeren Einflüssen. Die korrekte Polarität ist entscheidend. Die Frequenzweiche kann zur Anpassung an Fahrzeugakustik und Musikrichtung verwendet werden.
in anderen Sprachen
- English: Audio System MFIT User manual