Yamaha YT100 Bedienungsanleitung
- Kategorie
- Gitarrenzubehör
- Typ
- Bedienungsanleitung

YT-100
YT-100
r
GUITAR/BASS AUTO TUNER
w
t
t e
r
w
e
q
w
w
e
r
q
t
Thank you for purchasing the YAMAHA YT-100 Guitar/Bass Auto Tuner.
Please read this manual thoroughly and keep it in a safe place for future reference.
GUITAR/BASS AUTO TUNER
OWNER’S MANUAL
■ PRECAUTIONS
◆ To prevent damage, do not use the tuner in the following locations:
• places where the unit will be in direct sunlight;
• places subject to temperature and humidity extremes;
• places that are sandy or dusty.
◆ Use only two AAA (R03/LR03) batteries to power this tuner.
◆ For maximum battery life, always be sure the tuner is turned OFF when not in use.
◆ If an exhausted battery is left in the unit for an extended period of time, it may leak and cause malfunctioning
of the unit. When the battery becomes exhausted, always remove it and replace it as soon as possible.
◆ Do not subject the tuner to strong physical shock or vibration. Do not use excessive force on any of the controls.
◆ Never use solvents such as benzene or thinner to clean the tuner. Wipe clean with a soft, dry cloth.
◆ After reading the owner's manual, keep it in a safe place for future reference.
Never dispose of used batteries by burning them.
Also make sure to keep batteries away from children.
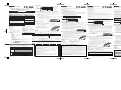
■ COMPONENTS
■ TUNING PROCEDURES
The tuner will automatically select the closest note name (string name) to the pitch
of the plucked string.
1. For electric guitars/basses, connect the guitar cable to the Input jack t.
*The built-in microphone e will not operate when a cable is plugged into the Input jack t.
2. Slide the Power/Mode switch r to select the type of instrument (GUITAR or BASS) you want to
tune. (The center green LED of Tuning guide w will flash.)
3. To tune an acoustic guitar, place the tuner’s built-in microphone e as close as possible to the
guitar’s sound hole.
4. Pluck the string you want to tune. (Do not pluck more than one string at a time.)
•First, adjust the string so that the appropriate string name pitch indicator q lights.
• Next, fine-tune the string until the tuning guide’s w green lamp lights.
When the lamp on the tuning guide flashes, tighten the string to raise its pitch. When the lamp
flashes, loosen the string to lower its pitch.
When this LED lights, the string is tuned correctly.
example) To tune the “E” string on a six string guitar.
The string name of the plucked string lights.
■ INSTALL/REPLACE THE BATTERY
1.
Press down on the battery cover (located on the back of the tuner) and slide it in the direction of the arrow.
2. Install two AAA (R03/LR03) batteries in the battery compartment, making sure that the batteries are
correctly aligned so that their polarity settings match the markings on the battery compartment.
* Always slide the Power/Mode switch r to “OFF” before changing the battery.
*Make sure that the batteries are aligned so that their polarity markings (+, –) match those on the battery
compartment. Incorrect installation may result in breakdown of the unit.
3. Slide the battery cover back into place.
YT-100
YT-100
e Built-in
microphone
As the batteries age, the indicator will dim. Using weak
batteries may result in irregular operation of the device.
Please exchange worn batteries with new ones (two AAA
(R03/ LR03)) as soon as possible.
Do not leave a depleted battery in the tuner for an extended
period of time as damage to the tuner caused by leaking
batteries, etc may result.
Two AAA (R03/LR03)
batteries
Bottom
side
Battery
cover
■ SPECIFICATIONS
Indicators : Pitch indicator, Tuning guides
Tuning Notes : GUITAR 7B, 6E, 5A, 4D, 3G, 2B, 1E
BASS LB, 4E, 3A, 2D, 1G, HC
Standard Pitch : A4=440Hz (fixed)
Input : Input jack (6
monaural), Built-in microphone
Power Source : Two AAA (R03/LR03) batteries
Dimensions (W x H x D) : 97 x 50 x 18 mm (3.8" x 2.0" x 0.71")
* Specifications and external appearance are subject to change without notice.
FCC INFORMATION (U.S.A.)
1. IMPORTANT NOTICE: DO NOT MODIFY THIS UNIT!
This product, when installed as indicated in the instructions contained in this manual, meets FCC
requirements. Modifications not expressly approved by Yamaha may void your authority, granted
by the FCC, to use the product.
2. IMPORTANT:
When connecting this product to accessories and/or another product use only high
quality shielded cables. Cable/s supplied with this product MUST be used. Follow all installation instruc-
tions. Failure to follow instructions could void your FCC authorization to use this product in the USA.
3. NOTE: This product has been tested and found to comply with the requirements listed in FCC
Regulations, Part 15 for Class “B” digital devices. Compliance with these requirements provides a
reasonable level of assurance that your use of this product in a residential environment will not
result in harmful interference with other electronic devices. This equipment generates/uses radio
frequencies and, if not installed and used according to the instructions found in the users manual,
may cause interference harmful to the operation of other electronic devices. Compliance with FCC
regulations does not guarantee that interference will not occur in all installations. If this product is
found to be the source of interference, which can be determined by turning the unit “OFF” and
“ON”, please try to eliminate the problem by using one of the following measures:
Relocate either this product or the device that is being affected by the interference.
Utilize power outlets that are on different branch (circuit breaker or fuse) circuits or install AC line filter/s.
In the case of radio or TV interference, relocate/reorient the antenna. If the antenna lead-in is 300
ohm ribbon lead, change the lead-in to co-axial type cable.
If these corrective measures do not produce satisfactory results, please contact the local retailer autho-
rized to distribute this type of product. If you can not locate the appropriate, please contact Yamaha
Corporation of America, Electronic Service Division, 6600 Orangethorpe Ave, Buena Park, CA 90620
The above statements apply ONLY to those products distributed by Yamaha Corpora-
tions of America or its subsidiaries.
w Tuning guide
r Power/Mode switch
q Pitch indicator
t Input jack
Vielen Dank für den Kauf des elektronischen Gitarren/Baß-Stimmgeräts YT-100 von YAMAHA.
Lesen Sie diese Anleitung bitte aufmerksam durch, und bewahren Sie sie dann zur späteren
Bezugnahme gut auf.
■ VORSICHTSMASSREGELN
◆ Verwenden Sie das Stimmgerät nicht an Orten, wo es den folgenden schädlichen Einflüssen ausgesetzt ist:
• Direktes Sonnenlicht
•Extreme Temperatur- und Luftfeuchtigkeitswerte
• Sand und Staub
◆ Benutzen Sie nur zwei AAA-Batterien (R03/LR03) für den Dreher.
◆ Schalten Sie das Stimmgerät nach Gebrauch stets aus, um die Batterien zu schonen.
◆
Wenn verbrauchte Batterien längere Zeit im Gerät verbleiben, können sie auslaufen und Schäden verursachen. Wenn die
Batterien schwächer werden, sollten Sie sie daher entnehmen und so bald wie möglich durch neue ersetzen.
◆ Schützen Sie das Stimmgerät vor starken Schlägen und Erschütterungen. Wenden Sie beim Betätigen der
Bedienelemente nicht zu viel Kraft auf.
◆ Verwenden Sie zum Säubern des Stimmgeräts keine Lösungsmittel wie Benzin oder Verdünner. Entfernen Sie
Staub und Schmutz mit einem weichen, trockenen Tuch.
◆ Bewahren Sie diese Anleitung nach dem Durchlesen gut auf.
Achten Sie bitte auf korrekte Entsorgung verbrauchter Batterien. Batterien dürfen nicht
verbrannt werden! Achten Sie bitte auch darauf, daß Batterien nicht in Kinderhände geraten.
■ STIMMVORGANG
Der Dreher wird den Namen der nächsten Melodie (Saitenname) zu dem Tonfall von der gezupften
Saite automatisch wählen.
1. Für elektrische Gitarren/Bässe verbinden Sie das Gitarrekabel mit der Inputbuchse t.
*Das eingebaute Mikrofon e wird nicht funktionieren, wenn ein Kabel in die Inputbuchse t eingesteckt wird.
2. Schieben Sie den Schalter für Strom/Modus r, um den Typ vom Instrument (GUITAR oder BASS),
das Sie einstellen möchte, zu wählen. (Das grüne zentrale LED vom Einstellensführer w wird blitzen.)
3. Um die akustische Gitarre einzustellen, stellen Sie das eingebaute Mikrofon vom dem Dreher e
so nah wie möglich neben die Tonöffnung der Gitarre.
4.
Zupfen Sie die Saite, die Sie einstellen möchte. (Zupfen Sie nicht mehr als eine Saite zur gleichen Zeit.)
• Zuerst stellen Sie die Saite, so dass der Tonfallindikator q für den angemessenen Saiten Namen blitzt.
• Dann stellen Sie die Saite ein bisschen ein, bis die grüne Lampe vom dem Einstellensführer
w
beleuchtet.
Wenn die -Lampe auf dem Einstellensführer blitzt, spannen Sie die Saite, um ihren Tonfall zu
erhöhen. Wenn die -Lampe blitzt, entspannen Sie die Saite, um ihren Tonfall zu senken.
ELEKTRONISCHES GITARREN/BASS-STIMMGERÄT
BEDIENUNGSANLEITUNG
YT-100
YT-100
■ EINLEGEN/AUSWECHSELN DER BATTERIE
1. Drücken Sie den Deckel von der Batterie (am Rücken des Drehers gestellt) und verschieben Sie
ihn in der Richtung vom Pfeil.
2. Installieren Sie zwei AAA-Batterien (R03/LR03) im Abschnitt für die Batterien. Vergewissern Sie
sich, dass die Batterien richtig eingestellt werden, so dass ihre Polaritäten den Bemerkungen bei
diesem Abschnitt entsprechen.
* Schieben Sie den Schalter für Strom/Modus r immer zu “OFF”, bevor Sie die Batterie wechseln.
*Vergewissern Sie sich, dass die Batterien eingestellt werden, so dass ihre Polaritäten (+, –) diesen
Bemerkungen bei diesem Abschnitt entsprechen. Falsche Installation könnte zum Zusammenbruch dieser
Einheit führen.
Zwei AAA-Batterien
(R03/LR03)
Unterseite
Deckel von
der Batterie
■ TECHNISCHE DATEN
Anzeigelampen : Tonfallindikator, Einstellenführer
Stimmnoten : E-Gitarre 7B, 6E, 5A, 4D, 3G, 2B, 1E
Baß LB, 4E, 3A, 2D, 1G, HC
Standardtonhohe : A4=440Hz (fest)
Eingänge : Inputbuchse (6
monaural), eingebautes Mikrofon
Power Source : Zwei AAA-Batterien (R03/LR03)
Abmessungen (B x H x T) : 97 x 50 x 18 mm
3. Schieben Sie den Batteriedeckel zurücken.
Wenn die Batterien altert, wird der Indikator vage. Die
Verwendung von gebrauchten Batterien könnte zur
ungeregelten Operation von diesem Apparat führen.
Ersetzen Sie die gebrauten Batterien durch die neuen
(zwei AAA (R03 / LR03)) so schnell wie möglich.
Lassen Sie keine gebrauchte Batterie in dem Dreher
für eine lange Zeitperiode, weil das Lecken der
Batterien z.B. den Dreher beschädigen könnte.
■ BAUTEILE
t Eingebautes Mikrofon
w Einstellenführer
q Tonfallindikator
r Schalter für Strom/Modus
Beispiel) Die E-Saite bei einer Gitarre
mit sechs Saiten einstellen.
Wenn dieses LED beleuchtet,
wird die Saite richtig eingestellt.
Der Saitename von der ge-
zupften Saite beleuchtet.
Bescheinigung des Importeurs
Hiermit wird bescheinigt, daß der / die / das
GUITAR/BASS AUTO TUNER Typ : YT-100
(Gerät, Typ, Bezeichnung)
in Übereinstimmung mit den Bestimmungen der
VERFÜGUNG 1046/84
(Amtsblattverfügung)
funkentstört ist.
Der Deutschen Bundespost wurde das Inverkehrbringen dieses Gerätes angezeigt und die
Berechtigung zur Überprüfung der Serie auf Einhaltung der Bestimmungen eingeräumt.
YAMAHA Europa GmbH
Name des Importeurs
* Änderungen an Daten und Design vorbehalten.
e
Inputbuchse
AFINADOR AUTOMATICO DE GUITARRA Y BAJO
MANUAL DEL PROPIETARIO
Gracias por comprar el YAMAHA YT-100 Afinador Automático de Guitarra y Bajo.
Por favor lea este manual completamente y manténgalo en un lugar seguro para futuras consultas.
■ PRECAUCIONES
◆ Para prevenir daños, no usar el afinador en las situaciones siguientes:
• los lugares donde la unidad estará expuesto a la luz del sol directa de forma continuada;
• los lugares sujetos a temperaturas y humedad extremas;
• lugares que son arenosos o polvorientos.
◆ Use solamente dos baterías de AAA (R03/LR03) para alimentar al sintonizador.
◆ Para la máxima vida de la pila, asegúrese que el afinador se apaga cuando no se usa.
◆ Sí una pila gastada queda en la unidad por un periodo extendido de tiempo, puede dañar la unidad. Cuando las
pilas se agotan, quítelas y reemplácelas lo más pronto posible.
◆ No someta el afinador a golpe físico fuerte o vibración. No use fuerza excesiva en cualquiera de los mandos.
◆ Nunca use disolventes como gasolina o aguarrás para limpiar el afinador. Límpielo con un paño suave y seco.
◆ Después de leer el manual, manténgalo en un lugar seguro para futuras consultas.
Nunca tire las pilas usadas al fuego.
También asegúrese de mantener las pilas lejos de los niños.
■ PROCEDIMIENTOS DE AFINACIÓN
El sintonizador seleccionará automáticamente el nombre de cuerda más cercano al tono de la
cuerda arrancada.
1. Para guitarras/basses eléctricas, conecte el cable de la guitarra al enchufe de entrada t.
*El micrófono incorporado e no va a funcionar cuando un cable se encuentra conectado al enchufe de
entrada t.
2. Mueva el interruptor de Potencia/Modo r para seleccionar el tipo del instrumento (GUITAR o
BASS) que intenta sintonizar. (El LED central de color verde del guía de sintonización w va a
brillar.)
3. Para sintonizar una guitarra acústica, ponga el micrófono interno del sintonizador e tan cercano
como sea posible al hueco de sonido de la guitarra.
4. Arranque la cuerda que intenta sintonizar. (No arranque más de una cuerda en una sola vez.)
• Primero, ajuste la cuerda a fin de que se encienda el indicador de tono del nombre de la cuerda
apropiada q.
• Luego, sintonice bien la cuerda hasta que se encienda la luz verde del guéa de sintonización w.
Cuando la luz en el guía de sintonización se haya encendido, atirante la cuerda para aumentar
su tono. Cuando la luz de se haya encendido, relaje la cuerda para bajar su tono.
Ejemplo) Sintonizar la cuerda “E” en
una guitarra con seis cuerdas.
■ COMPONENTES
YT-100
YT-100
Cuando el LED se encienda,
la cuerda ya es sintonizada
correctamente.
El nombre de la cuerda
arrancada se enciende.
■ INSTALACIÓN/REEMPLAZO DE LA PILA
1. Presione para abajo la tapa de la batería (se ubica en la espalda del sintonizador) y deslícela en
la dirección que indica la flecha.
2. Instale dos baterías de AAA (R03/LR03) en el compartimiento de batería y asegúrese que las
baterías se encuentren alineadas correctamente a fin de que sus polaridades correspondan a las
marcas en el compartimiento de batería.
* Siempre deslice el interruptor de Potencia/Modo r a “OFF” antes de cambiar de la batería.
* Asegúrese que las baterías se encuentren alineadas correctamente a fin de que las marcas de su polaridad
(+, –) correspondan a aquéllas en el compartimiento de batería. Una instalación Incorrecta puede resultar
en una falla total de la unidad.
3. Deslice la tapa de batería hasta su posición inicial.
Lado
inferior
Tapa de la batería
Cuando las baterías están envejeciendo, el indicador se
va oscureciendo. El uso de baterías impotentes puede
resultar en irregular operación del dispositivo.
Por favor, sustituya baterías consumidas por unas nuevas
(dos AAA (R03/LR03)) tan pronto como sea posible.
No deje una batería ya gastada en el sintonizador por un
largo período de tiempo porque así puede resultar en
daños producidos por escape de baterías u otras causas.
■ ESPECIFICACIONES
Indicadores : indicador de tono, guías de sintonización
Notas de afinación : GUITARRA: 7B, 6E, 5A, 4D, 3G, 2B, 1E
BAJO: LB, 4E, 3A, 2D, 1G, HC
Tone estandar :A4=440Hz (fijo)
Entradas :
Enchufe de entrada (6 destinado a un solo oyente), Micrófono incorporado
Alimentación :Dos AAA (R03/LR03) baterías
Dimensiones (W x H x D) : 97 x 50 x 18 mm
* Las especificaciones y la apariencia externa están sujetas a cambio sin previo aviso.
Dos AAA (R03/LR03)
baterías
e micrófono
incorporado
w Guía del sintonizador
q Indicador del tono
t Enchufe de entrada
r
interruptor de Potencia/Modo
ACCORDEUR AUTOMATIQUE DE
GUITARE/BASSE
MODE D’EMPLOI
Nous vous remercions d’avoir porté votre choix sur l’accordeur automatique de guitare/basse
YAMAHA YT-100. Nous vous prions de lire attentivement ce mode d’emploi et de le conserver en lieu
sûr pour vous y reporter ultérieurement.
■ PRECAUTIONS
◆
Afin de ne pas endommager l’accordeur, évitez de l’utiliser dans des endroits répondant aux conditions suivantes :
• plein soleil
• humidité ou températures excessives.
• sable ou poussière
◆ Il faut utiliser deux batteries de AAA (R03/LR03) afin de fournir la puissance pour ce tuner.
◆ Pour garantir une longévité maximale des piles, mettez toujours l’accordeur hors tension lorsque vous ne
l’utilisez pas.
◆ Les piles épuisées qui restent dans l’accordeur pendant une longue période, peuvent fuir et provoquer des
anomalies de fonctionnement. Lorsque les piles présentent des signes de décharge, remplacez-les dans le
délai le plus bref.
◆ L’accordeur ne doit pas subir de chocs ni de vibrations importants. Ne le manipulez jamais avec une force
excessive.
◆ N’utilisez jamais de solvants tels que de la benzine ou du diluant pour nettoyer l’accordeur. Essuyez-le avec
un chiffon doux et sec.
◆ Après avoir lu ce mode d’emploi, conservez-le en lieu sûr pour vous y reporter ultérieurement.
Ne jetez jamais les piles au feu et conservez-les toujours hors de portée des enfants.
■ PROCÉDURES D’ACCORD
Ce tuner sélectera automatiquement le nom de la note le plus proche (nom de la
corde) pour l’adjustement du ton de la corde résonnée.
1. Pour les guitars électriques/basses, joindre le câble du guitar à l’effort dynamique d’entrée t.
* Le microtéléphone intégré e ne marchera pas quand un câble est placé dans l’effort dynamique d’entrée t.
2. Mettre en fonction la puissance/commutateur de mode r pour sélecter le type de l’instrument
(GUITAR ou BASS) que vous voulez accorder. (Le centre vert LED de guide d’accorder w étincelera.)
3. Pour accorder un guitard acoustique, placer le microtéléphone intégré de l’utilisateur e le plus
proche possible du trou du son.
4. Faire résonner la corde quelle vous voulez accorder. (Ne faire résonner pas plus d’une corde pour
une fois.)
•D’abord, accorder la corde donc l’indicateur de l’adjustement du ton q du nom approprié de la
corde étincele.
•Et puis, fin –accorder le guide d’accorder w de la corde utile la lampe verte étincele.
Quand la lampe sur le guide d’accorder étincele, serrer la corde pour élever l’effort dynamique
d’entrée, Quand la lampe étincele, lâcher la corde pour baisser l’effort dynamique d’entrée.
■ INSTALLATION OU REMPLACEMENT DE LA PILE
1. Ouvrir la couverture de la battrie (se trouver derrière du tuner) et placer la battrie dans le tuner
d’après la direction de la flèche.
2. Installer deux battries de AAA (R03/LR03) dans le compartiment de batterie, s’assurer que les
battries soient correctement alignées, donc leur arrangements de polarité accorde avec l’
inscription sur le compartiment de batterie.
*Mettre toujours en fonction la puissance/ commutateur de mode r en “OFF” avant changer la batrrie.
*Etre assuré que les battries sont alignées donc leur arrangements de polarité (+, –) accorde avec l’
inscription sur le compartiment de batterie. L’installation incorrecter produira une panne du tuner.
3. Glisser le dos de la couverture des piles dans la direction opposante.
Quand la battrie devient ancienne, l’indicateur
devient faible. Utiliser la battrie faible cauera une
opération irrégulière du dispositif.
Changer la battrie épuisée avec des battrie neuves
(deux AAA (R03/LR03)) le plus rapidement possible.
Ne pas laisser une battrie épuisée dans le tuner
pendant une période prolongée, car cela peut
produire des dommages pour le tuner.
Couverture
de la battrie
deux AAA
(R03/LR03) batteries
Fond de
l’accordeur
YT-100
YT-100
■ NOMENCLATURE
t Effort dynamique d’entrée
e Microtéléphone
intégré
w Guide d’accorder
r Puissance/commutateur de mode
q Indicateur de l’adjustement du ton
■ FICHE TECHNIQUE
Indicateurs : Indicateur de l’adjustement du ton, Guides d’accorder
Notes d’accord : guitare 7B, 6E, 5A, 4D, 3G, 2B, 1E
basse LB, 4E, 3A, 2D, 1G, HC
Hauteur de son standard : A4=440Hz (fixe)
Entrée : Effort dynamique d’entrée (6
monaural), Microtéléphone intégré
Source d’alimentation : deux AAA (R03/LR03) batteries
Dimensions (L x H x P) : 97 x 50 x 18 mm
LE PRESENT APPAREIL NUMERIQUE N'EMET PAS DE BRUITS RADIOELECTRIQUES DEPASSANT
LES LIMITES APPLICABLES AUX APPAREILS NUMERIQUES DE LA "CLASSE B" PRESCRITES DANS
LE REGLEMENT SUR LE BROUILLAGE RADIOELECTRIQUE EDICTE PAR LE MINISTERE DES COM-
MUNICATIONS DU CANADA.
* Les spécifications et l’aspect externe peuvent être modifiés sans aucun avis.
THIS DIGITAL APPARATUS DOES NOT EXCEED THE “CLASS B” LIMITS FOR RADIO NOISE EMIS-
SIONS FROM DIGITAL APPARATUS SET OUT IN THE RADIO INTERFERENCE REGULATION OF THE
CANADIAN DEPARTMENT OF COMMUNICATIONS.
Exemple) Pour accorder la corde “E” sur
un guitard de six cordes
Quand ce LED étincele, la corde
est correctement accordée.
Le nom de la corde de la
corde résonnée étincele.
08.8.22, 6:23 PMPage 1
-
 1
1

Yamaha YT100 Bedienungsanleitung
- Kategorie
- Gitarrenzubehör
- Typ
- Bedienungsanleitung
in anderen Sprachen
- English: Yamaha YT100 Owner's manual
- français: Yamaha YT100 Le manuel du propriétaire
- español: Yamaha YT100 El manual del propietario
- 日本語: Yamaha YT100 取扱説明書