
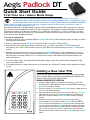
Quick Start Guide
First-Time Use / Admin Mode Setup
Aegis Padlock DT
There are two ways to establish a User PIN: Admin-generated
while in Admin Mode, and User-generated while Padlock DT is
placed in User Forced Enrollment State.
ADMIN-GENERATED USER PIN
1. Enter the Admin Mode by pressing and holding + 0 for ve
seconds (RED LED will blink.) Enter the Admin PIN and press
(BLUE LED will glow solidly.)
2. Press and hold
+ 1 until the BLUE LED glows solidly and the
GREEN LED starts blinking.
3. Enter the PIN to be used as your User code and press .
(BLUE
LED will turn off and GREEN LED will blink 3 times by itself,
then will continue blinking as BLUE LED resumes glowing
solidly)
4. Quickly re-enter that same PIN once more and press
.
(If the PIN was successfully added, BLUE LED will turn off,
GREEN LED will illuminate for a second or two and then will
turn off, followed by the BLUE LED glowing solidly indicating
that the key has returned to Admin Mode. If PIN is unaccept-
able or the second entry doesn’t match the rst, RED LED
will ash three times, followed by solid BLUE / Blinking GREEN
LEDs.
NOTE:
if you are using the Aegis Congurator (sold separately) to set up your
Padlock DT, rst ensure that the device to be congured has the “congurable” logo
on the belly label.
Also, DO NOT perform the following Manual Admin and USER PIN SETUP
steps below; The Aegis Congurator will only recognize devices in their factory “out of box” state or
devices that have been completely reset.
Each Aegis Padlock DT is shipped without a preset Personal Identication Number (PIN.) To prepare the Key for
use, the user must rst establish an Admin PIN that is between 7 and 16 digits in length. PINs cannot contain all
consecutive numbers or all the same numbers (e.g. 123456789, 987654321 or 11111111, 22222222, etc.This
Admin PIN is used to set the Secure Key’s various Admin features and also serves as the rst of two User PINS
for the Secure Key’s standard operation.
To Set Up the Admin PIN:
1. Plug the Padlock DT into a powered USB port. (BLUE and GREEN LEDs will glow solidly, indicating no Admin
PIN has been established.)
2. Press + 9 simultaneously. (BLUE LED will glow solidly and GREEN LED will blink.)
3. Enter the PIN to be used as your Admin code and press
(If PIN is accepted, BLUE LED will turn off
momentarily and GREEN LED will blink 3 times by itself, then will continue blinking as the BLUE LED glows
solidly.)*
4. Quickly re-enter that same PIN once more and press
(BLUE LED will turn off momentarily and GREEN
LED will illuminate for one second until replaced by the BLUE LED glowing solidly, indicating that the Admin
PIN has been set and the Padlock DT is in Admin mode, ready to add another User PIN [see reverse] or for
setting up features.)
5. To exit the Admin mode, press
(RED LED will glow solidly) or wait 30 seconds and then Padlock DT will
return to standby mode.
6. If no additional users or Admin features are to be enabled, your Padlock DT setup is now complete and ready
for use.
CONFIGURABLE
Adding a New User PIN

Revised July 2019
Locking the Padlock DT
To lock the key, simply press the button. When locked, the RED LED will glow solidly.
If data is still being written to the Padlock DT, it will wait for this operation to be completed before the locking
operation takes place. The button can also be used to exit out of the Admin mode.
Note: The Aegis Padlock DT will not be recognized by any operating system in its locked state.
Unlocking the Padlock DT
CREATING FORCED ENROLLMENT STATE ALLOWING USER TO GENERATE USER PIN
Note: This can only be done if there isn’t already a User PIN established on the key using the method above.
1. Enter the Admin Mode by holding + 0 for ve seconds; With RED LED blinking, enter the Admin PIN and
press the button. The BLUE LED will glow solidly.
2. Press 0 + 1 and the GREEN LED will blink three times, then will be replaced by BLUE LED glowing solidly.
3. Press the button to return the key to its locked state. The key is now in User Forced Enrollment State,
allowing a User to establish his own User PIN.
USER-GENERATED USER PIN IN FORCED ENROLLMENT STATE
1. Press and ensure that the BLUE and the GREEN LEDs are glowing solidly.
2. Press
+ 1 and ensure that the BLUE LED continues glowing solidly while the GREEN LED blinks. Enter
the new User PIN and press the
button. The GREEN LED will blink three times by itself and then will be
joined by the BLUE LED glowing solidly.
3. Within 30 seconds, enter that same User PIN once more, and press the
button again. This time, the GREEN
LED will glow solidly for a few seconds, then the drive will return to its locked state, indicated by the RED
LED glowing solidly. The key’s data can now be accessed using either the User PIN or the Admin PIN.
Adding a New User PIN (cont’d)
Formatting For Mac OS
For the Mac OS, you must rst reformat the drive to a Mac compatible le system.
1. Connect drive to USB port and unlock using the Admin PIN.
2. Open the Mac Disk Utility from Applications/Utilities/Disk Utilities.
3. Select the Aegis Fortress from the list of drives and volumes.
4. Click the ‘Erase’ tab.
5. Enter a name for the drive. The default name is Untitled.
6. Select a volume format to use. The Volume Format dropdown menu lists the available
drive formats that the Mac supports. The recommended format type is ‘Mac OS Extended
(Journaled).’
7. Click the ‘Erase’ button. Disk Utility will
unmount the volume from the desktop,
erase it, and then remount it on
the desktop.
1. Beginning in standby mode, press the button to wake the drive. (The RED LED will glow solidly.)
2. Enter either an Admin PIN or User PIN and press the button.
(If the PIN is accepted, the GREEN LED will quickly blink four times, then continue to blink slowly until
it’s plugged into a USB port, after which will then glow solidly;
If the PIN is incorrect, the RED LED will blink three times and then glow solidly.)
Upon correct PIN entry, the key will be unlocked and ready for use. If it is not plugged into a USB port
within 30 seconds, the key will return to sleep mode and automatically lock itself.
© Apricorn 2019. All rights reserved.
12191 Kirkham Road, Poway, CA, U.S.A. 92064
1.
Website
https://www.apricorn.com/FAQs
2.
E-mail us at [email protected]
3. Call Technical Support at 1-800-458-5448 from
8:00 a.m. to 5:00 p.m. PST, M - F
Technical Support
Remember to save your password(s) in a safe place. For advanced feature setup info, refer to the complete user’s
manual loaded on your Aegis Padlock DT drive and is also available on Apricorn’s website: apricorn.com/support

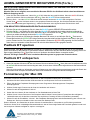
Guía de Referencia Rápida
Modo Inicial / Modo de Administrador
Aegis Padlock DT
Agregar un nuevo PIN de usuario
Hay dos formas de establecer un PIN de usuario: generado por
el administrador en modo de administración y generado por el
usuario mientras Padlock DT se coloca en estado de inscripción
forzada de usuario
PIN DE USUARIO ADMINISTRADO
1. Ingrese al modo de administración presionando y manteniendo
presionado
+ 0 durante cinco segundos (el LED ROJO
parpadeará). Ingrese el PIN de administración y presione
(el LED
AZUL se iluminará permanentemente).
2. Mantenga presionado
+ 1 hasta que el LED AZUL se ilumine de
manera sólida y el LED VERDE comience a parpadear.
3. Ingrese el PIN que se usará como su código de usuario y presione
. (El LED AZUL se apagará y el LED VERDE parpadeará 3 veces
por sí mismo, luego continuará parpadeando mientras el LED AZUL
se ilumina permanentemente)
4. Vuelva a ingresar rápidamente ese mismo PIN una vez más y presi-
one
. Si el PIN se agregó con éxito, el LED AZUL se apagará, el
LED VERDE se iluminará por uno o dos segundos y luego se apa-
gará, seguido del LED AZUL que brilla intensamente para indicar
que la tecla ha regresado al Modo de administración.
Nota: Si está utilizando el Congurador Aegis (se vende por separado) para congurar su Padlock DT,
primero asegúrese de que el dispositivo que se va a congurar tenga la etiqueta del logotipo
“congurable”. Si está usando el Con gurador para con gurar sus Productos Seguros Aegis, NO
lleve a cabo ninguno de los pasos que se describen abajo; el Con gurador Aegis únicamente puede reconocer
Productos Seguros Aegis en su Modo Inicial.
Cada Aegis Padlock DT se envía sin un Número de identicación personal (PIN) preestablecido. Debe establecerse un PIN
de Administrador de entre siete y dieciséis dígitos antes de la primera utilización. Los PINs deben tener un mínimo de siete
dígitos y un máximo de dieciséis dígitos. Un PIN no puede contener solo números secuenciales (p.ej., 01234567, 9876543)
y no puede consistir en el mismo número (p.ej., 1111111, 2222222.) El PIN de Administrador puede usarse para conmutar
cualquier función del Modo de Administrador, además de para acceder a los datos del Producto Seguro Aegis.
Para congurar el PIN de administrador:
1.
Conecte el Padlock DT a un puerto USB con alimentación.
(AZUL sólido/ VERDE sólido, indicating indicando que no se ha establecido un PIN de administrador.)
2. Presione + 9 simultáneamente.
(El LED AZUL brillará sólidamente y el LED VERDE parpadeará.)
3. Ingrese el PIN que se usará como su código de administrador y presione . (Si se acepta el PIN, el LED
AZUL se apagará momentáneamente y el LED VERDE parpadeará 3 veces por sí mismo, luego continuará
parpadeando mientras el LED AZUL se ilumina de manera continua.)*
4. Vuelva a ingresar rápidamente ese mismo PIN una vez más y presione (El LED AZUL se apagará
momentáneamente y el LED VERDE se iluminará durante un segundo hasta que el LED AZUL se ilumine
permanentemente, lo que indica que se ha congurado el PIN de administrador y que el Padlock DT está en el
modo de administrador, lista para agregar otro PIN de usuario [vea el reverso ] o para congurar funciones.)
5.
Para salir del modo de administración, presione (el LED ROJO se iluminará de forma continua) o espere 30
segundos y Padlock DT de seguridad volverá al modo de suspensión.
6.
Si no se agregan usuarios adicionales o se conguran las funciones de administración, la conguración de le
Padlock DT ahora está completa y lista para su uso.
CONFIGURABLE

Bloqueo del Padlock DT
Para bloquear la unidad, simplemente pulse el botón . De tener éxito, el LED ROJO se iluminará
permanentemente. Si todavía se están escribiendo datos en el Producto Aegis Padlock DT, el Modo
Bloqueado se retrasará hasta que la operación se haya completado. El botón también se puede utilizar
para salir del modo de administración.
Nota: En Modo Bloqueado, NINGÚN sistema operativo reconocerá Productos Aegis Padlock DT.
Desbloqueo del Padlock DT
CREACIÓN DEL ESTADO DE INSCRIPCIÓN FORZADA QUE PERMITE AL USUARIO GENERAR UN PIN DE USUARIO
Nota: Esto solo se puede hacer si no hay un PIN de usuario establecido en la clave usando el método anterior.
1. Ingrese al modo de administración manteniendo presionado + 0 durante cinco segundos; Con el LED ROJO
parpadeando, ingrese el PIN de administración y presione el botón . El LED AZUL brillará sólidamente.
2. Presione 0 + 1 y el LED VERDE parpadeará tres veces, luego se reemplazará con el LED AZUL que brilla
intensamente.
3. Presione el botón
para regresar la llave a su estado bloqueado. La clave ahora se encuentra en estado de
inscripción forzada del usuario, lo que permite que un usuario establezca su propio PIN de usuario.
PIN DE USUARIO GENERADO POR EL USUARIO EN EL ESTADO DE INSCRIPCIÓN FORZADA
1. Presione y asegúrese de que los LED AZUL y VERDE se enciendan de manera continua.
2. Presione + 1 y asegúrese de que el LED AZUL siga brillando sólidamente mientras el LED VERDE parpa-
dea. Ingrese el nuevo PIN de usuario y presione el botón . El LED VERDE parpadeará tres veces solo y luego
se unirá el LED AZUL que brilla intensamente.
3. Dentro de los 30 segundos, ingrese el mismo PIN de usuario una vez más y presione el botón nuevamente.
Esta vez, el LED VERDE brillará sólidamente durante unos segundos, luego la unidad volverá a su estado
bloqueado, indicado por el LED ROJO que brilla intensamente. Ahora se puede acceder a los datos de la clave
usando el PIN de usuario o el PIN de administrador.
Agregando un nuevo PIN de usuario (cont.)
Formato para Mac OS
Para Mac OS, primero debe formatear la unidad a un sistema de archivos compatible con Mac.
1. Conecte la unidad al puerto USB y desbloquee con el PIN de administrador.
2. Abra la Utilidad de disco de Mac desde Aplicaciones / Utilidades / Utilidades de disco.
3. Seleccione Aegis PADLOCK DT de la lista de unidades y volúmenes.
4. Haga clic en la pestaña “Borrar”.
5. Ingrese un nombre para la unidad. El nombre predeterminado es Sin título.
6. Seleccione un formato de volumen para usar. El menú desplegable Formato de volumen
enumera los formatos de unidad disponibles que admite Mac. El tipo de formato recomendado
es “Mac OS extendido (registrado)”.
7. Haga clic en el botón “Borrar”. Utilidad de disco desmontar el volumen del escritorio, bórrelo y
luego vuelva a montarlo el escritorio.
Recuerde guardar su (s) contraseña (s) en un lugar seguro. Para obtener información de
conguración avanzada de funciones, consulte el manual del usuario completo cargado en su unidad
Aegis Padlock DT y también está disponible en el sitio web de Apricorn: apricorn.com/support
1. Comenzando en el modo de espera, presione el botón
para activar la unidad. (El LED ROJO brillará
sólidamente).
2. Ingrese un PIN de administrador o un PIN de usuario y presione el botón .
(Si se acepta el PIN, el
LED VERDE parpadeará rápidamente cuatro veces, luego continuará parpadeando lentamente hasta
que se conecte a un puerto USB, luego de lo cual brillará de manera continua. Si no está conectado a
un puerto USB dentro de los 30 segundos de desbloqueo). La tecla volverá al modo de suspensión y se
bloqueará automáticamente. El LED ROJO parpadeante indica que el PIN no se ingresó correctamente.
© Apricorn 2019. Todos los derechos reservados.
12191 Kirkham Road, Poway, CA, U.S.A. 92064

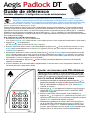
Guide de référence
Première utilisation / Conguration en mode administrateur
Aegis Padlock DT
Ajouter un nouveau code PIN utilisateur
Il existe deux façons d’établir un code PIN utilisateur: généré par
l’administrateur en mode Admin et généré par l’utilisateur lorsque
Padlock DT est placé dans l’état d’inscription forcée de l’utilisateur.
NIP UTILISATEUR GÉNÉRÉ PAR ADMIN
1. Accédez au mode Admin en maintenant enfoncée la touche + 0
pendant cinq secondes (le voyant ROUGE clignote).Entrez le code
PIN de l’administrateur et appuyez sur (le voyant BLEU
s’allume en continu.)
2. Appuyez sur + 1 et maintenez-le enfoncé jusqu’à ce que le
voyant DEL BLEU reste allumé et que le voyant DEL VERT
commence à clignoter.
3. Entrez le code PIN à utiliser comme code d’utilisateur et
appuyez sur . (Le voyant BLEU s’éteindra et le voyant VERT
clignotera 3 fois tout seul, puis continuera à clignoter lorsque le
voyant BLEU s’allumera de manière continue)
4. Ressaisissez rapidement le même code PIN et appuyez sur
. Si le code PIN a été ajouté avec succès, le voyant BLEU
s’éteindra, le voyant VERT s’allumera pendant une seconde
ou deux, puis s’éteindra, suivi du voyant BLEU clignotant pour
indiquer que la clé est revenue en mode administrateur.
Remarque : Si vous utilisez le congurateur Aegis (vendu séparément) pour congurer votre
Padlock DT, commencez par vérier que le périphérique à congurer porte le logo «congurable»
sur l’étiquette du ventre. Si vous utilisez le con gurateur pour installer vos produits sécurisés Aegis,
NE suivez PAS les étapes ci-dessous ; les produits sécurisés Aegis peuvent être reconnus par l’Aegis Con
gurator uniquement en Mode prêt à l’emploi.
Chaque Aegis Padlock DT est livré sans numéro d’identication personnel (NIP) prédéni. Un code PIN administrateur
composé de sept à seize chiffres doit être dé ni avant la première utilisation. Les codes PIN doivent compter au moins
sept chiffres et au plus seize chiffres. Un code PIN ne peut pas être composé d’une série de chiffres (par ex. : 01234567,
9876543) et ne peut pas être une répétition du même chiffre (par ex. : 1111111, 2222222.) Le code PIN administrateur
peut servir à activer/désactiver n’importe quelle fonction du mode administrateur et permettre l’accès aux données situées
sur le produit sécurisé Aegis.
Pour congurer le code PIN administrateur:
1. Branchez le Padlock DT sur un port USB alimenté
(Les voyants BLEU et VERT restent allumés, ce qui indique qu’aucun code condentiel administrateur n’a été établi.)
2. Appuyez sur
+ 9 simultanément.
(La DEL BLEUE reste allumée et la DEL VERT clignote.)
3. Entrez le code PIN à utiliser comme code d’administrateur et appuyez sur
(Si le code PIN est accepté, le voyant
BLEU s’éteint momentanément et le voyant VERT clignote 3 fois tout seul, puis continue de clignoter tant que le
voyant BLEU est allumé.) *
4. Ressaisissez rapidement le même code PIN et appuyez sur
(La DEL BLEUE s’éteint momentanément et la DEL
VERT s’allume pendant une seconde, jusqu’à ce qu’elle soit remplacée par la DEL BLEUE allumée, ce qui indique
que le code PIN administrateur a été déni et que le Padlock DT est en mode Admin, prête à ajouter un autre code
PIN utilisateur. ] ou pour congurer les fonctionnalités.)
5. Pour quitter le mode Admin, appuyez sur
(la DEL ROUGE reste allumée) attendez 30 secondes, puis Padlock DT
repassera en mode veille.
6. Si aucun utilisateur ou fonctionnalité Admin supplémentaire ne doit être activé, votre conguration Padlock DT est
maintenant terminée et prête à être utilisée.
CONFIGURABLE

Verrouillage du Padlock DT
Pour verrouiller le lecteur, appuyez simplement sur le bouton . En cas de succès, le voyant ROUGE
sera allumé en continu. Si une écriture de données est en cours sur le produit Aegis Padlock DT, le mode
verrouillé sera reporté jusqu’à la n de l’opération.
Remarque:
Les produits sécurisés Padlock DT verrouillé NE sont reconnus par AUCUN système
d’exploitation.
Déverrouillage du Padlock DT
CRÉATION D’ÉTAT D’INSCRIPTION FORCÉ PERMETTANT À L’UTILISATEUR DE GÉNÉRER UN NIP D’UTILISATEUR
Remarque: cela ne peut être fait que si un code PIN utilisateur n’a pas déjà été déni sur la clé en utilisant la
méthode ci-dessus.
1. Accédez au mode Admin en appuyant sur + 0 pendant cinq secondes. La voyant ROUGE clignotant,
entrez le code PIN administrateur et appuyez sur le bouton . La voyant BLEUE brille de façon continue.
2. Appuyez sur 0 + 1 et la voyant VERTE clignotera trois fois, puis sera remplacée par la voyant BLEUE
allumée. Appuyez sur le bouton pour ramener la clé à son état verrouillé. La clé est maintenant dans l’état
d’inscription forcée par l’utilisateur, permettant à un utilisateur d’établir son propre code PIN utilisateur.
NIP UTILISATEUR GENERE PAR L’UTILISATEUR DANS UN ETAT D’ENREGISTREMENT FORCE
1. Appuyez sur et assurez-vous que les voyants bleu et vert sont allumés en continu.
2. Appuyez sur + 1 et assurez-vous que la voyant BLEUE continue de briller de manière continue pendant
que la voyant VERTE clignote. Entrez le nouveau code PIN utilisateur et appuyez sur le bouton . La voyant
VERTE clignotera trois fois seule puis sera rejoint par la voyant BLEUE allumée.
3. Dans les 30 secondes, entrez à nouveau le même code PIN utilisateur et appuyez à nouveau sur le
bouton . Cette fois-ci, la voyant VERTE reste allumée pendant quelques secondes, puis le lecteur revient à
son état verrouillé, indiqué par la voyant ROUGE allumée. Les données de la clé sont désormais accessibles
à l’aide du code PIN utilisateur ou du code PIN administrateur.
Ajouter un nouveau code PIN utilisateur (suite)
Formatage pour Mac OS
Pour Mac OS, vous devez d’abord reformater le lecteur sur un système de chiers compatible Mac.
1. Connectez le lecteur au port USB et déverrouillez-le à l’aide du code PIN administrateur.
2. Ouvrez l’utilitaire de disque Mac à partir de Applications / Utilitaires / Utilitaires de disque.
3. Sélectionnez la forteresse Aegis dans la liste des lecteurs et des volumes.
4. Cliquez sur l’onglet ‘Effacer’.
5. Entrez un nom pour le lecteur. Le nom par défaut est Sans titre.
6. Sélectionnez un format de volume à utiliser. Le menu déroulant Format du volume répertorie les formats
de lecteur disponibles pris en charge par le Mac. Le type de format recommandé est «Mac OS étendu
(journalisé)».
7. Cliquez sur le bouton ‘Effacer’. Utilitaire de disque démontera le volume du bureau, l’effacera puis le
remontera sur le bureau.
N’oubliez pas de sauvegarder votre mot de passe dans un endroit sûr. Pour plus d’informations sur la
conguration des fonctionnalités avancées, reportez-vous au manuel de l’utilisateur complet chargé sur votre
lecteur Aegis Padlock DT. Il est également disponible sur le site Web d’Apricorn: apricorn.com/support
1. En mode veille, appuyez sur le bouton pour réactiver le lecteur. (La LED ROUGE reste allumée.)
2. Entrez un code PIN administrateur ou un code PIN utilisateur et appuyez sur le bouton . (Si le code PIN est
accepté, le voyant VERT clignotera rapidement quatre fois, puis continuera de clignoter lentement jusqu’à ce
qu’il soit branché sur un port USB, après quoi il restera alors entièrement allumé. S’il n’est pas branché sur un
port USB dans les 30 secondes suivant le déverrouillage, la touche repasse en mode veille et se verrouille
automatiquement. Le voyant ROUGE clignotant indique une saisie incorrecte du code PIN.)
© Apricorn 2019. Tous les droits sont réservés.
12191 Kirkham Road, Poway, CA, U.S.A. 92064

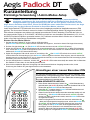
Kurzanleitung
Erstmalige Verwendung / Admin-Modus-Setup
Aegis Padlock DT
Hinzufügen einer neuen Benutzer-PIN
Es gibt zwei Möglichkeiten, die Benutzer-PIN zu erstellen: Vom
Administrator im Administratormodus erstellt, und vom Benutzer
generiert, während Padlock DT in den Status der erzwungenen
Benutzerregistrierung versetzt wird.
ADMIN-GENERIERTE USER-PIN
1. Rufen Sie den Admin-Modus auf, indem Sie + 0 fünf Sekunden lang
gedrückt halten (die ROTE LED blinkt). Geben Sie die Admin-PIN ein und
drücken Sie
(die BLAUE LED leuchtet dauerhaft.)
2. Halten Sie
+ 1 gedrückt, bis die BLAUE LED dauerhaft leuchtet und
die GRÜNE LED zu blinken beginnt.
3. Geben Sie die PIN ein die als Benutzercode verwendet werden soll, und
drücken Sie
. (Die BLAUE LED erlischt und die GRÜNE LED blinkt
dreimal von selbst und blinkt dann weiter, wenn die BLAUE LED wieder
durchgehend leuchtet.)
4. Geben Sie die gleiche PIN schnell noch einmal ein und drücken Sie
. (Wenn die PIN erfolgreich hinzugefügt wurde, erlischt die BLAUE LED,
die GRÜNE LED leuchtet ein oder zwei Sekunden lang und erlischt
dann, gefolgt von der BLAUEN LED, die durchgehend leuchtet, um
anzuzeigen, dass der Schlüssel in den Administratormodus zurück-
gekehrt ist. Wenn die PIN nicht akzeptiert wird blinkt die ROTE LED
dreimal, gefolgt von durchgehend BLAUEN / GRÜN blinkenden LEDs.
HINWEIS: Wenn Sie das Padlock DT mit dem Aegis Congurator (separat erhältlich)
einrichten, vergewissern Sie sich zunächst, dass das zu kongurierende Gerät mit dem
kongurierbaren Logo gekennzeichnet ist. Falls Sie den Con gurator verwenden, um Ihre
Aegis Secure-Produkte einzurichten, führen Sie KEINEN der unten stehenden Schritte durch; der Aegis
Con gurator kann nur Aegis Secure-Produkte im Out-of-Box-Modus erkennen.
Jedes Aegis Padlock DT Produkt wird ohne eine vorher festgelegte persönliche Identikationsnummer (PIN)
geliefert. Vor dem ersten Gebrauch muss eine sieben- bis sechzehnstellige Admin-PIN eingerichtet werden.
PINs müssen mindestens aus sieben und maximal aus sechzehn Zeichen bestehen. Eine PIN darf nicht nur
aus sequenziellen Zahlen (z. B. 01234567, 9876543) und nicht nur aus derselben Zahl bestehen (z. B. 1111111,
2222222).Die Admin-PIN kann verwendet werden, um Funktionen aus dem Admin- Modus aus zu aktivieren
sowie um auf die Aegis Secure-Produktdaten zuzugreifen.
Richten Sie die Admin-PIN ein:
1. Stecken Sie das Padlock DT in einen aktiven USB-Anschluss.
(Die BLAUEN und GRÜNEN LEDs leuchten dauerhaft und zeigen an, dass keine Admin-PIN eingerichtet wurde.)
2. Drücken Sie gleichzeitig
+ 9. (Die BLAUE LED leuchtet konstant und die GRÜNE LED blinkt.)
3. Geben Sie die PIN ein, die als Administratorcode verwendet werden soll, und drücken Sie (Wenn PIN akzeptiert
wird, erlischt die BLAUE LED vorübergehend und die GRÜNE LED blinkt dreimal von selbst und blinkt dann weiter,
während die BLAUE LED dauerhaft leuchtet.) *
4. Geben Sie die gleiche PIN schnell erneut ein und drücken Sie
(Die BLAUE LED erlischt kurz und die GRÜNE
LED leuchtet eine Sekunde lang auf, bis die BLAUE LED durchgehend leuchtet. Dies zeigt an, dass die Admin-PIN
festgelegt wurde und der Padlock DT
sich im Admin-Modus bendet, um eine weitere Benutzer-PIN hinzuzufügen [siehe
Rückseite ]
oder zum Einrichten von Funktionen.)
5. Um den Admin-Modus zu verlassen, drücken Sie (die ROTE LED leuchtet dauerhaft) oder warten Sie 30 Sekunden.
Der Padlock DT kehrt dann in den Standby Modus zurück.
6. Wenn keine zusätzlichen Benutzer hinzugefügt oder Administratorfunktionen festgelegt werden
sollen, ist die
Einrichtung des Padlock DT jetzt abgeschlossen und einsatzbereit.
CONFIGURABLE

Padlock DT sperren
Drücken Sie die Taste um das Laufwerk zu sperren. Im gesperrten Zustand leuchtet die ROTE LED dauerhaft.
Wenn noch Daten in den Padlock DT geschrieben werden, wartet dieser auf den Abschluss dieses Vorgangs, bevor der
Sperrvorgang stattndet. Die Taste kann auch zum Verlassen des Admin-Modus verwendet werden.
Hinweis: Der Aegis Padlock DT wird von keinem Betriebssystem im gesperrten Zustand erkannt.
Padlock DT entsperren
ERSTELLEN EINES ERZWUNGENEN EINTRAGUNGSZUSTANDES, DER DEM BENUTZER ERLAUBT, EINE
BENUTZER-PIN ZU ERSTELLEN
Hinweis: Dies ist nur möglich, wenn noch keine Benutzer-PIN für den Schlüssel mit der oben beschriebenen
Methode festgelegt wurde.
1. Rufen Sie den Admin-Modus auf, indem Sie + 0 fünf Sekunden lang gedrückt halten. Wenn die ROTE LED blinkt,
geben Sie die Admin-PIN ein und drücken Sie die
Taste. Die BLAUE LED leuchtet dauerhaft.
2. Drücken Sie 0 + 1 und die GRÜNE LED blinkt dreimal, danach leuchtet die BLAUE LED durchgehend. Drücken
Sie die Taste
um den Schlüssel wieder in den gesperrten Zustand zu bringen. Der Schlüssel bendet sich jetzt im
Status “Benutzererzwungene Registrierung”, sodass ein Benutzer seine eigene Benutzer-PIN einrichten kann.
VOM BENUTZER ERZWUNGENER EINTRAGUNGSMODUS
1. Drücken Sie und vergewissern Sie sich, dass die BLAUE und die GRÜNE LED dauerhaft leuchten.
2. Drücken Sie + 1 und stellen Sie sicher, dass die BLAUE LED weiterhin durchgehend leuchtet, während die
GRÜNE LED blinkt. Geben Sie die neue Benutzer-PIN ein und drücken Sie die Taste. Die GRÜNE LED blinkt
dreimal von selbst und danach leuchtet die BLAUE LED dauerhaft.
3. Geben Sie innerhalb von 30 Sekunden dieselbe Benutzer-PIN erneut ein und drücken Sie die Taste erneut.
Dieses Mal leuchtet die GRÜNE LED einige Sekunden lang dauerhaft und das Laufwerk kehrt dann in den ges-
perrten Zustand zurück. Dies wird durch ein dauerhaftes Leuchten der ROTEN LED angezeigt. Auf die Schlüssel-
daten kann nun entweder mit der Benutzer-PIN oder der Administrator-PIN zugegriffen werden.
ADMIN-GENERIERTE BENUTZER-PIN (Forts.)
Formatierung für Mac OS
Unter Mac OS müssen Sie zuerst das Laufwerk auf ein Mac-kompatibles Dateisystem umformatieren.
1. Schließen Sie das Laufwerk an den USB-Anschluss an und entsperren Sie es mit der Admin-PIN.
2. Öffnen Sie das Mac-Festplatten-Dienstprogramm unter Programme / Dienstprogramme / Festplatten-
Dienstprogramme.
3. Wählen Sie die Aegis Fortress aus der Liste der Laufwerke und Volumes.
4. Klicken Sie auf die Registerkarte “Löschen”.
5. Geben Sie einen Namen für das Laufwerk ein. Der Standardname ist Ohne Titel.
6. Wählen Sie ein Volume-Format aus. Das Dropdown-Menü Volume Format (Volume-Format) listet die verfügbaren
Laufwerkformate auf, die der Mac unterstützt. Der empfohlene Formattyp ist “Mac OS Extended (Journaled)”.
7. Klicken Sie auf die Schaltäche “Löschen”. Das Festplatten-Dienstprogramm hebt die Bereitstellung des Volumes vom
Desktop auf, löscht es und stellt es dann erneut auf dem Desktop bereit.
Denken Sie daran, Ihre Passwörter an einem sicheren Ort aufzubewahren. Informationen zur Einrichtung erweiterter
Funktionen nden Sie im vollständigen Benutzerhandbuch, das auf Ihrem Aegis Padlock DT-Laufwerk geladen ist und auch
auf der Apricorn-Website verfügbar ist: apricorn.com/support
1. Drücken Sie im Standby-Modus die
Taste, um das Laufwerk zu reaktivieren. (Die ROTE LED leuchtet dauerhaft.)
2. Geben Sie entweder eine Admin-PIN oder eine Benutzer-PIN ein und drücken Sie die
Taste. (Wenn die PIN akzeptiert wird, blinkt
die GRÜNE LED viermal schnell und dann langsam weiter, bis sie an einen USB-Anschluss angeschlossen ist. Danach leuchtet sie
dauerhaft.
Wenn sie nicht innerhalb von 30 Sekunden nach dem Entsperren an einen USB-Anschluss angeschlossen ist kehrt die Taste in den
Ruhemodus zurück und sperrt sich automatisch selbst. Eine rot blinkende LED zeigt eine falsche PIN-Eingabe an.
© Apricorn 2019. Alle Rechte vorbehalten.
12191 Kirkham Road, Poway, CA, 92064
U.S.A.

Guida rapida
Installazione per la prima volta / Modalità amministratore
Aegis Padlock DT
Aggiunta di un nuovo PIN utente
Esistono due modi per stabilire un PIN utente: generato dall’amminis-
tratore in modalità amministratore e generato dall’utente mentre
Padlock DT viene inserito nello stato di registrazione forzata
dell’utente.
PIN GENERATO DALL’AMMINISTRATORE
1. Entra nella modalità Admin tenendo premuto + 0 per cinque
secondi (il LED ROSSO lampeggia) Inserire il PIN amministratore
e premere (il LED BLU si illuminerà in modo sso).
2. Premere e tenere premuto + 1 no a quando il LED BLU si
illumina in modo sso e il LED VERDE inizia a lampeggiare.
3. Immettere il PIN da utilizzare come codice utente e premere
. (Il LED BLU si spegnerà e il LED VERDE lampeggerà 3 volte
da solo, quindi continuerà a lampeggiare quando il LED BLU
riprenderà a lampeggiare in modo sso)
4. Reinserire rapidamente lo stesso PIN ancora una volta e
premere . Se il PIN è stato aggiunto con successo, il LED
BLU si spegnerà, il LED VERDE si illuminerà per un secondo
o due e poi si spegne, seguito dal LED BLU che si illumina in
modo sso indicando che il tasto è tornato in Modalità Ammin.
Nota: Se si utilizza Aegis Congurator (venduto separatamente) per congurare il proprio
Padlock DT, assicurarsi innanzitutto che il dispositivo da congurare sia dotato del logo
“congurabile” sull’etichetta del ventre. In caso di utilizzo del Con guratore per impostare un
prodotto Aegis Secure, NON eseguire i passaggi di seguito: il Con guratore Aegis è in grado di riconoscere
soltanto i prodotti Aegis Secure in modalità Out- of-Box.
Ogni Aegis Padlock 3.0 viene spedito senza un numero di identicazione personale preimpostato (PIN). Prima del
primo utilizzo è necessario creare un PIN amministratore da 7-16 cifre. I PIN devono contenere un minimo di sette
caratteri e un massimo di sedici. Un PIN non può contenere numeri in sequenza (ad es., 01234567, 9876543)
e non può contenere lo stesso numero ripetuto (ad es., 1111111, 2222222). Il PIN amministratore può essere
utilizzato per passare alla modalità amministratore in qualsiasi dispositivo o per accedere ai dati del prodotto Aegis
Secure.
Per impostare il PIN amministratore:
1. Collegare il Padlock DT a una porta USB alimentata.(I LED BLU e VERDE si illuminano in modo sso, a
indicare che non è stato stabilito il PIN amministratore).
2. Premere
+ 9 contemporaneamente. (Il LED BLU si illuminerà in modo sso e il LED VERDE lampeggerà.)
3. Inserire il PIN da utilizzare come codice amministratore e premere
. (Se il PIN è accettato, il LED BLU si
spegnerà momentaneamente e il LED VERDE lampeggerà 3 volte da solo, quindi continuerà a lampeggiare
mentre il LED BLU si illumina sso).*
4. Reinserire rapidamente lo stesso PIN ancora una volta e premere
. (Il LED BLU si spegne
momentaneamente e il LED VERDE si illumina per un secondo no a quando il LED BLU non si accende,
indicando che il PIN amministratore è stato impostato e il Padlock 3.0 è in modalità Admin, pronto per
aggiungere un altro PIN utente [vedi retro] o per impostare le funzionalità.)
5. Per uscire dalla modalità amministratore, premere
(Il LED ROSSO si illumina in modo sso) o attendere 30
secondi e il Padlock DT tornerà in modalità standby.)
6. Se non è necessario abilitare altri utenti o funzioni di amministrazione, l’installazione di Padlock DT è ora
completa e pronta per l’uso.
CONFIGURABLE

Blocco di Padlock DT
Per bloccare l’unità, premere semplicemente il pulsante . Se bloccato, il LED ROSSO si illuminerà in modo sso.
Se i dati vengono ancora scritti nella chiave sicura, attenderanno che questa operazione venga completata prima
che l’operazione di blocco abbia luogo. Il pulsante può anche essere utilizzato per uscire dalla modalità Admin.
Nota: Aegis Padlock DT non verrà riconosciuto da nessun sistema operativo in stato di blocco.
Sbloccare di Padlock DT
CREAZIONE DI UNO STATO DI ISCRIZIONE FORZATO CHE PERMETTE L’UTENTE DI GENERARE IL PIN
DELL’UTENTE
Nota: questa operazione può essere eseguita solo se non esiste già un PIN utente denito sulla chiave
utilizzando il metodo sopra riportato.
1. Entra nella modalità Admin tenendo
+ 0 per cinque secondi; Con il LED ROSSO lampeggiante, inserire il PIN
amministratore e premere il pulsante
. Il LED BLU si illuminerà saldamente.
2. Premere 0 + 1 e il LED VERDE lampeggerà tre volte, quindi verrà sostituito dal LED BLU che si illumina in modo
sso. Premere il pulsante
per riportare la chiave allo stato bloccato. La chiave è ora in stato di registrazione
forzata utente, consentendo a un utente di stabilire il proprio PIN utente.
PIN UTENTE GENERATO UTENTE NELLO STATO DI ISCRIZIONE FORZATO
1. Collegare l’unità a una porta USB alimentata e assicurarsi che i LED BLU e VERDE si illuminino saldamente.
2. Premere
+ 1 e assicurarsi che il LED BLU continui a lampeggiare in modo sso mentre il LED VERDE
lampeggia. Inserire il nuovo PIN utente e premere il pulsante
. Il LED VERDE
3. Entro 30 secondi, immettere nuovamente lo stesso PIN utente e premere nuovamente il pulsante
. Ques-
ta volta, il LED VERDE si illuminerà in modo sso per alcuni secondi, quindi il convertitore tornerà in stato di
blocco, indicato dal LED ROSSO che si illumina in modo sso. Ora è possibile accedere ai dati della chiave
utilizzando il PIN utente o il PIN amministratore.
Aggiunta di un nuovo PIN utente (continua)
Formattazione per Mac OS
Per Mac OS, è necessario prima riformattare l’unità in un le system compatibile con Mac.
1. Collegare l’unità alla porta USB e sbloccarla utilizzando il PIN amministratore.
2. Apri l’Utilità disco Mac da Applicazioni / Utilità / Utilità disco.
3. Selezionare Aegis Fortress dall’elenco di unità e volumi.
4. Fai clic sulla scheda “Cancella”.
5. Immettere un nome per l’unità. Il nome predenito è Senza titolo.
6. Selezionare un formato volume da utilizzare. Il menu a discesa Formato volume elenca i formati di unità
disponibili supportati dal Mac. Il tipo di formato consigliato è “Mac OS esteso (Journaled)”.
7. Fai clic sul pulsante “Cancella”. Utility Disco smonterà il volume dal desktop, lo cancellerà e quindi lo rimonterà
sul desktop.
Ricorda di salvare le password in un luogo sicuro. Per informazioni sulla congurazione avanzata delle funzionalità,
consultare il manuale dell’utente completo caricato sull’unità Aegis Padlock DT ed è disponibile anche sul sito Web
di Apricorn: apricorn.com/support
1. A partire dalla modalità standby, premere il pulsante
per riattivare l’unità. (Il LED ROSSO si illuminerà in modo sso.)
2. Immettere un PIN amministratore o un PIN utente e premere il pulsante
. (Se il PIN viene accettato, il LED
VERDE lampeggia rapidamente quattro volte, quindi continua a lampeggiare lentamente no a quando non
viene collegato a una porta USB, dopodiché si illumina in modo sso. Se non viene collegato a una porta USB
entro 30 secondi dallo sblocco , il tasto ritorna in modalità sospensione e si blocca automaticamente da solo. Il
LED ROSSO lampeggiante indica l’inserimento errato del PIN.)
Dopo l’inserimento corretto del PIN, la chiave sarà sbloccata e pronta per l’uso. Se non viene collegato a una
porta USB entro 30 secondi, il tasto ritorna in modalità sospensione e si blocca automaticamente.
© Apricorn 2019. Tutti i diritti riservati
12191 Kirkham Road, Poway, CA, U.S.A. 92064
-
 1
1
-
 2
2
-
 3
3
-
 4
4
-
 5
5
-
 6
6
-
 7
7
-
 8
8
-
 9
9
-
 10
10


Aegis Padlock DT Schnellstartanleitung
- Typ
- Schnellstartanleitung
- Dieses Handbuch eignet sich auch für
in anderen Sprachen
- français: Aegis Padlock DT Guide de démarrage rapide
- español: Aegis Padlock DT Guía de inicio rápido
- italiano: Aegis Padlock DT Guida Rapida
Verwandte Artikel
Andere Dokumente
-
Apricorn Aegis Padlock 3 Schnellstartanleitung
-
Apricorn Aegis Secure 3NXC Schnellstartanleitung
-
Apricorn Aegis Padlock SSD Schnellstartanleitung
-
-
-
-
-
-
-